The Microsoft 365 Multi-Tenant integration lets you sync Microsoft 365 data from multiple tenants in one place. This article walks you through the setup steps in Microsoft Entra ID and Partner Center, then shows you how to connect the integration in Lifecycle Manager and complete the initial sync.
Note
This article captures third-party steps and/or an interface that may have since been updated.
Note
As you connect integrations, review which clients will sync into the platform. Imported clients count toward your purchased account limit, and many integrations may sync all clients by default. We will notify you when you are close to exceeding your client limit.
To get started, confirm that the requirements below are met, then expand each section to complete the setup process.
Before you begin
- You have access to the Microsoft Azure portal for your partner tenant.
- You have access to Microsoft Partner Center.
- You can create and manage users, security groups, and role assignments in Microsoft Entra ID.
- You are able to create a dedicated service account and complete first-time sign-in and MFA enrolment.
- The dedicated service account used to authorize the Microsoft 365 Multi-Tenant integration must have Multi-Factor Authentication enabled using Microsoft Authenticator push notifications. If MFA is not enabled with this method, Microsoft’s APIs can report that the account has no MFA, which can cause the sync to fail.
- Your customer tenants use Granular Dedicated Admin Privileges (GDAP)
- Each customer tenant either has an active GDAP relationship with the required roles, or can accept a new GDAP relationship request.
Who can add this integration?
- Administrators.
- Users with Manage Sync Settings permission on their ScalePad Hub account.
Step 1: Creating a dedicated service account
Step 1: Creating a dedicated service account
A dedicated service account is required to provide authorization to Lifecycle Manager. Creating a new account will ensure it’s set up correctly.
Follow these steps to create a fresh account in your Azure environment:
- Go to the Microsoft Azure portal: https://portal.azure.com/
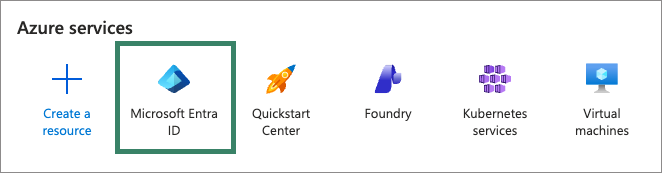
- From the Azure home screen, select Microsoft Entra ID. (Or use the search bar to find the Entra ID service)
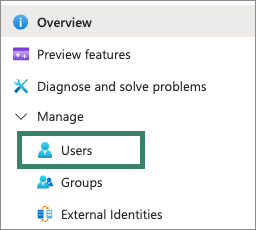
- In the left navigation panel, expand the Manage section and select Users.
- At the top of the Users page, click + New user and select Create new user.
- Enter the user details:
- User principal name (for example, LifecycleManagerServiceAccount)
- Display name
- Leave Auto-generate password enabled.
- Ensure Account enabled is selected.
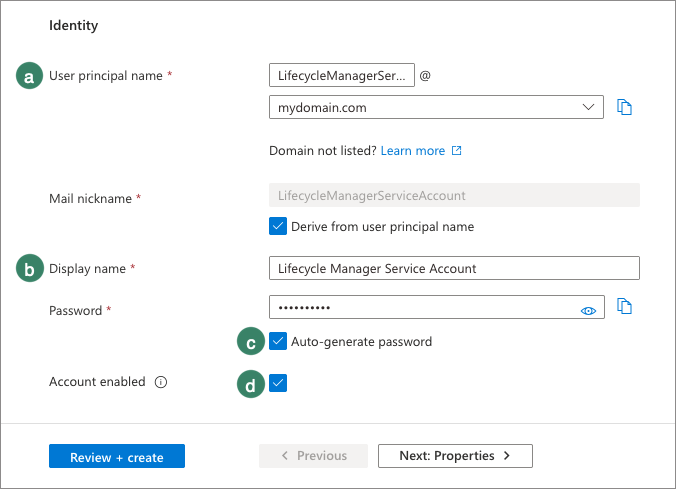
- Click Review + Create, then click Create.
This creates the service account that Lifecycle Manager will use later in the integration. - After creating the user, sign in once using this account to complete Microsoft’s first-time setup and Multi Factor Authentication (MFA) enrollment.
This step is required for the Microsoft 365 integration to authenticate successfully.
Step 2: Assigning the required Microsoft roles to the service account
Step 2: Assigning the required Microsoft roles to the service account
Assigning the correct Microsoft roles to the service account ensures it has the necessary access to authorize and retrieve data during the initial setup of the integration.
- From the Azure portal go to Microsoft Entra ID by clicking its icon under Azure services, or by using the search bar to find it.
- In the left navigation menu expand the Manage section and click Users, then click the name of the user created in step 1 to open the user overview.
- In the left navigation menu, click Assigned Roles.
- At the top of the Assigned roles page, click + Add assignments.
- In the search box at the top of the assignments modal, search for Global administrator and check the box beside it.
- At the bottom of the modal, click Add.
- Confirm that Global Administrator shows in the list of assigned roles for the user.
Note
The Global Administrator role is only required for initial integration setup. After the integration has been connected, and authorization is complete in Lifecycle Manager (Step 6), you can remove Global administrator and replace it with Application administrator or Cloud application administrator
Step 3: Add the service account to the AdminAgents group
Step 3: Add the service account to the AdminAgents group
The AdminAgents group is required for Partner Center API access. This is required to interact with the Partner Center API.
- In the Azure portal, go to Microsoft Entra ID by clicking its icon under Azure services or by using the search bar to find it.
- From the left navigation menu, select Groups.
- In the search box, type AdminAgents, and click the result.
- In the left navigation for the group, click Members (You may need to expand the Manage section).
- Click + Add Members.
- Search for the service account created in Step 1 and check the box next to it.
- At the bottom of the panel, click Select.
- Confirm the service account appears in the list of group members.
Step 4: Create a GDAP Lifecycle Manager group
Step 4: Create a GDAP Lifecycle Manager group
- In the Azure portal, go to Microsoft Entra ID by clicking its icon under Azure services or by using the search bar to find it.
- In the left navigation panel, expand the Manage section and Select Groups.
- At the top of the page, click + New group.
- Fill in the group details:
- Group type: Security
- Group name: A descriptive group name (eg. GDAP Lifecycle Manager)
- Membership type: Assigned
- Leave the other fields at their default values.
- Click Create at the bottom of the page.
- After the group is created, open the group from the main groups page and select Members from the left navigation panel.
- Click + Add members at the top of the page.
- Find the service account created in Step 1, and select the check box next to it.
- Click Select at the bottom of the page.
- Confirm that the service account appears in the group’s member list.
Step 5: Update GDAP relationships in Partner Center
Step 5: Update GDAP relationships in Partner Center
Your GDAP Lifecycle Manager security group must be associated with each customer tenant you manage. These delegated admin relationships are controlled in Microsoft Partner Center.
- Go to the Microsoft Partner Center at https://partner.microsoft.com/
- Under Workspaces, select Customers.

- Select a customer from the list to open their details.
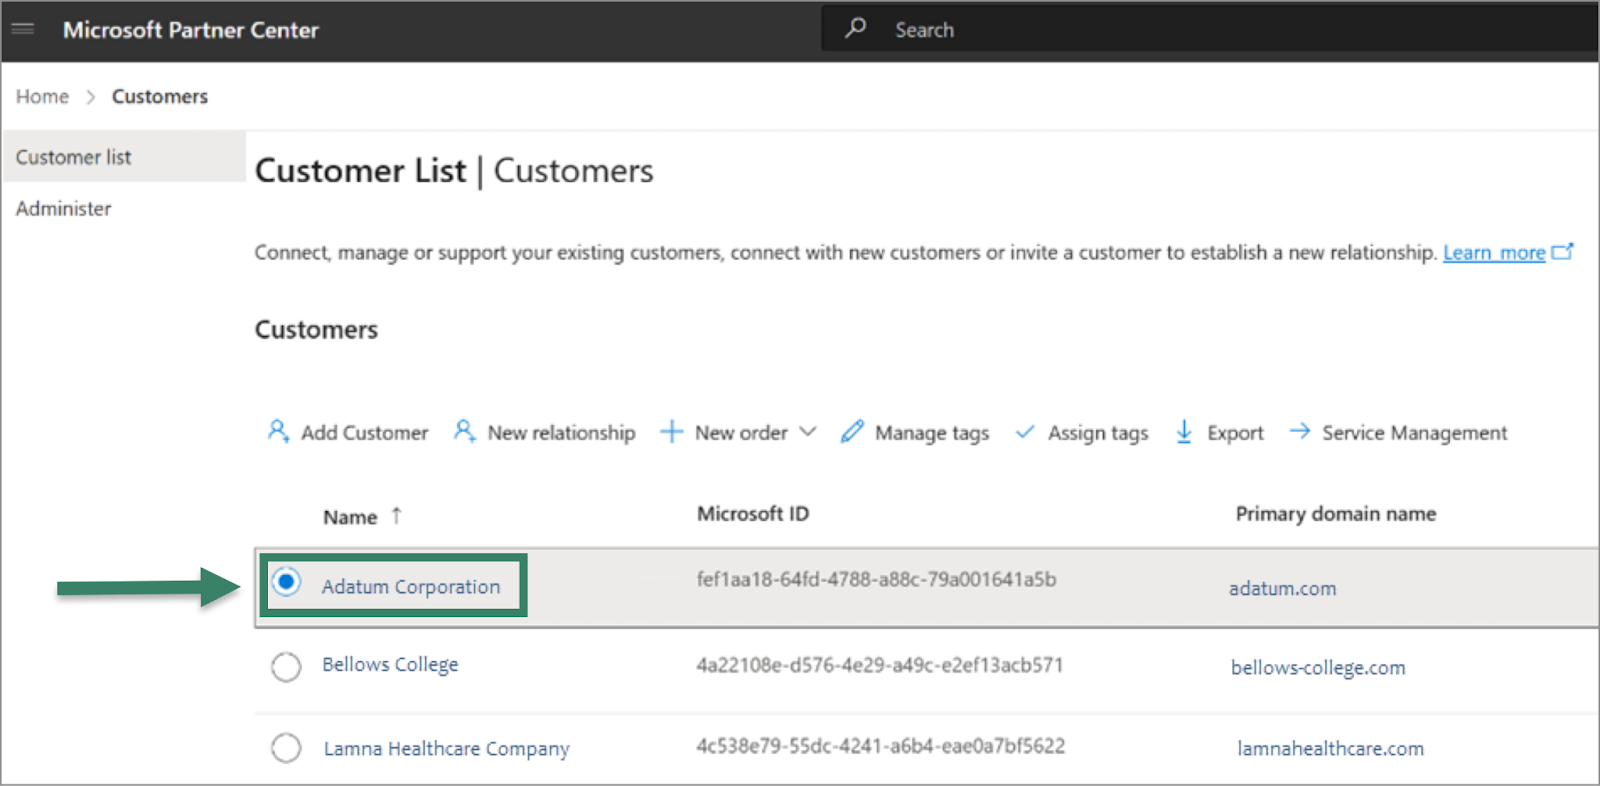
- Select Admin relationships and open the active GDAP relationship.
- Identify the security group(s) assigned to the GDAP relationship that includes the following roles: - Application Administrator - Cloud Application Administrator - Privileged Role Administrator
- In a new browser tab, open the Azure portal, and go to Microsoft Entra ID > Groups, locate that customer specific GDAP group, and open it.
- Select Members, then + Add members.
- Search for and select the GDAP Lifecycle Manager group created in Step 4, then click Select.
- Repeat these steps for each customer tenant.
If no GDAP relationship exists for a customer
- In Partner Center, request a new GDAP relationship with the following roles: - Application Administrator - Cloud Application Administrator - Privileged Role Administrator
- After the customer accepts the relationship request, follow steps 6-9 above to add the GDAP Lifecycle Manager group to the newly created GDAP security group.
Step 6: Connect Microsoft 365 Multi-Tenant in Lifecycle Manager
Step 6: Connect Microsoft 365 Multi-Tenant in ScalePad
After completing the Azure and Partner Center configuration, you can connect the integration in ScalePad.
- From the ScalePad Hub, click Integrations in the top navigation bar.
- Click the Add integration button.
- Under the SaaS category, click the Microsoft M365 Multi-Tenant tile:
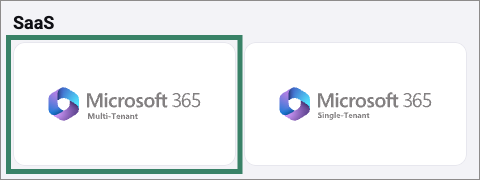
- Click Connect & Continue - A Microsoft Login window will appear.
- Sign in using the dedicated service account you created in Step 1.
- Complete MFA if prompted.
After authorization is successful, the integration appears in your list of connected integrations.
Note
Once authorization has been completed successfully, you can remove the Global Administrator role from the service account. Replace it with either the Application Administrator or Cloud Application Administrator role to limit the account’s access to only what Lifecycle Manager needs.
Sync timing
A successful connection indicates that authorization is complete.
The initial sync can take up to 48 hours. This is expected and doesn't require any action during that time.
Troubleshooting
If you run into any unexpected errors or problems while setting up your Microsoft 365 Multi-tenant integration, see our troubleshooting guide for common issues:
Any questions?
Reach out to our Lifecycle Manager support team by submitting a support ticket.
Join our MSP Power-Ups
:sparkles: NEW :sparkles: Free 15-minute micro-workshops + live Q&A with our Lifecycle Manager experts. Sign up here to reserve your spot.